You are currently viewing DIY Furniture Makeovers: Learn Creative and Cost-Effective Ways to Refurbish Old Furniture

DIY Furniture Makeovers: Learn Creative and Cost-Effective Ways to Refurbish Old Furniture

  • Post author:

Introduction

Are you tired of your old furniture but hesitant to part with it? Fear not! In this article, we delve into the exciting world of DIY furniture makeovers, offering 25 comprehensive insights to help you breathe new life into your cherished pieces. Let’s embark on a journey of creativity, cost-effectiveness, and the joy of refurbishing.

Identifying Furniture Pieces Suitable for Makeovers

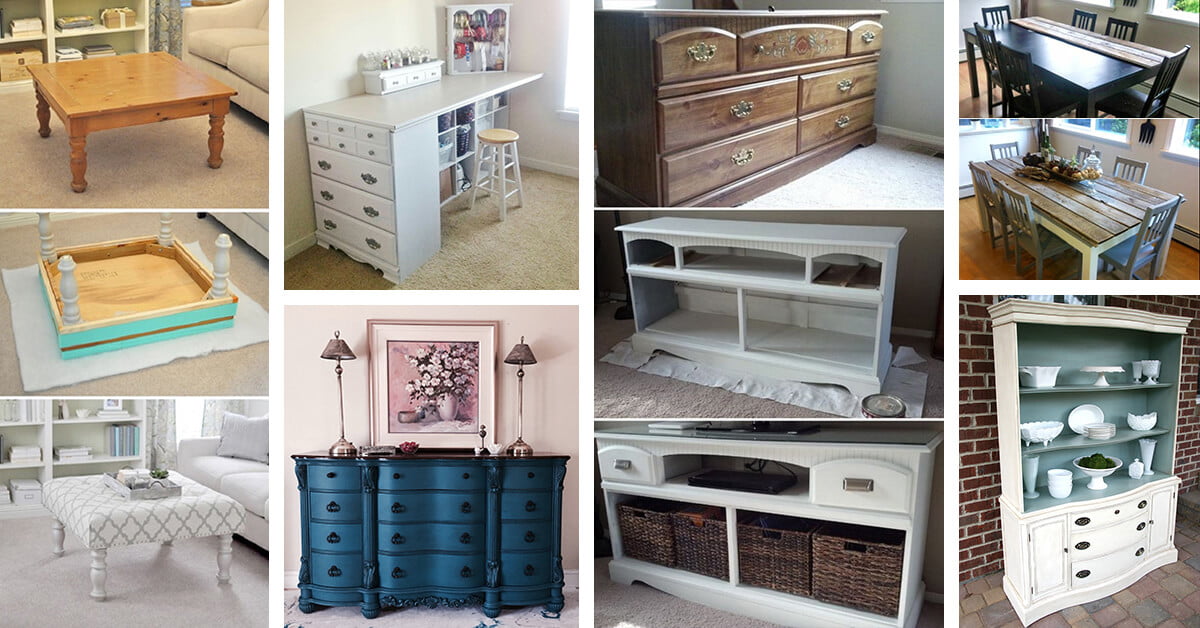
When it comes to revamping your living space, the allure of transforming old furniture into chic, personalized pieces is undeniable. However, not all pieces are created equal when it comes to makeovers. Identifying furniture with potential for a stunning transformation is the key to a successful project.

Begin your hunt by seeking out sturdy pieces that have good bones. Solid wood frames or well-constructed pieces are ideal candidates for makeovers, as they provide a durable foundation for your creative endeavors. Look for classic shapes and timeless designs that can be easily updated to suit your style preferences.

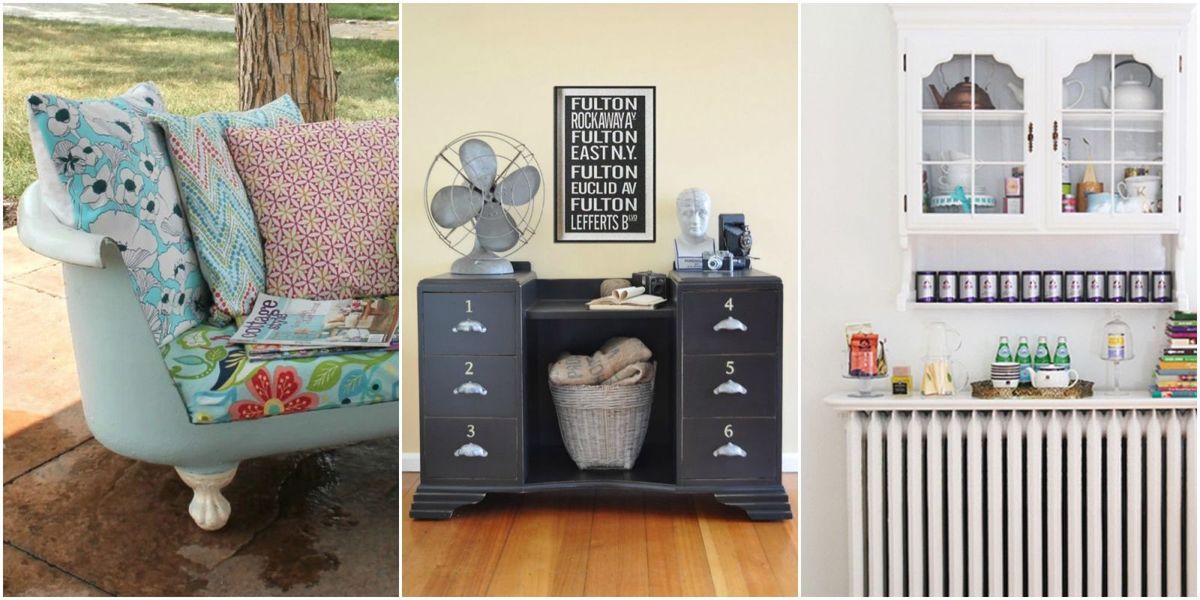
Keep an eye out for unique features or details that can be accentuated during the makeover process. Intricate carvings, interesting hardware, or distinctive legs can add character and charm to the final result. Remember, the goal is to breathe new life into these pieces, so choose items that inspire your creativity.

Consider the functionality of the furniture as well. Pieces that serve a practical purpose, such as storage chests or side tables, can be both aesthetically pleasing and useful after the makeover. Assessing the potential for functionality ensures that your revamped furniture not only looks great but also serves a purpose in your home.

Considering the Condition, Material, and Style Before Starting

Before embarking on a furniture makeover journey, it’s crucial to conduct a thorough assessment of the piece’s condition, material, and style. These factors will influence the approach you take and contribute to the longevity of the revamped furniture.

Firstly, evaluate the condition of the furniture. Minor scratches or dents are often manageable, but extensive damage may require more intricate repairs. Ensure that the structural integrity is intact before investing time and effort into the makeover. It’s wise to fix any major issues before proceeding with the aesthetic transformation.

The material of the furniture plays a significant role in the makeover process. Different materials require specific techniques and products for refinishing. For instance, wood may need sanding and staining, while metal might require rust removal and a fresh coat of paint. Understanding the material will guide your decisions and help achieve the desired outcome.

Consider the existing style of the furniture and how it aligns with your vision for the revamped piece. Whether you’re aiming for a vintage, modern, or eclectic look, the original style provides a foundation for your creative direction. Harmonizing the existing style with your intended design ensures a cohesive and visually appealing result.

Essential Tools Needed for Furniture Makeovers

Embarking on a furniture makeover project can be both exciting and rewarding, but having the right tools is crucial for a successful transformation. Here’s a comprehensive list of essential tools you’ll need:

Sanding Tools:

Start with coarse-grit sandpaper and progressively move to finer grits for a smooth finish.

Paintbrushes and Rollers:

Different sizes for various surfaces. High-quality brushes ensure a professional look.

Painter’s Tape:

Achieve clean lines and protect areas you don’t want to paint.

Primer:

Prepares the surface for paint and enhances adhesion.

Drop Cloths:

Protect your workspace from drips and spills.

Safety Gear:

Gloves, safety glasses, and a mask for protection during sanding and painting.

Screwdrivers and Wrenches:

Essential for disassembling and reassembling furniture.

Wood Filler:

Repairs any dents, scratches, or imperfections on the furniture.

Tack Cloth:

Removes dust before painting for a smoother finish.

Polyurethane or Sealant:

Protects the final paint job and adds durability.

Having these tools on hand will streamline the furniture makeover process, ensuring professional results and a stunning final product.

Choosing the Right Paint, Varnish, or Finishes for Different Furniture Types

Selecting the appropriate paint, varnish, or finish is crucial for achieving the desired look and ensuring the longevity of your furniture makeover. Consider the following tips when making your choices:

Wood Furniture:

Paint: Choose latex or oil-based paints for wood furniture. Latex is quick-drying, while oil-based provides a durable finish.

Varnish/Finish: Opt for polyurethane for a clear, protective finish. Matte finishes offer a more natural look, while gloss adds shine.

Metal Furniture:

Paint: Use enamel or spray paint specifically formulated for metal surfaces.

Varnish/Finish: Apply a clear sealant to protect against rust and corrosion.

Laminate or Veneer Furniture:

Paint: Use a bonding primer before applying latex paint for better adhesion.

Varnish/Finish: Choose a water-based polyurethane for a durable, clear finish.

Outdoor Furniture:

Paint: Acrylic or outdoor-specific paints with UV protection for durability.

Varnish/Finish: Select marine-grade varnish or a weather-resistant finish.

Wicker or Rattan Furniture:

Paint: Spray paint is ideal for intricate designs on wicker. Choose oil-based for a longer-lasting finish.

Varnish/Finish: Use clear lacquer to protect and enhance the natural texture.

By tailoring your choices to the specific type of furniture, you’ll ensure a successful and aesthetically pleasing furniture makeover that stands the test of time.

DIY Furniture Makeovers: Learn Creative and Cost-Effective Ways to Refurbish Old Furniture

Surface Preparation: Sanding, Cleaning, and Repairing

Achieving a flawless finish on your DIY projects begins with meticulous surface preparation. Sanding is the foundation of any successful painting or staining endeavor. Start by selecting the appropriate grit sandpaper based on the surface condition. Coarse grits like 80-120 are ideal for removing old paint or rough surfaces, while finer grits like 220-400 smooth out imperfections.

Once sanding is complete, thorough cleaning is essential. Use a mild detergent or a degreaser to remove dust, dirt, and any lingering residues. This ensures proper adhesion of paint or stain to the surface. Pay special attention to corners and crevices where grime tends to accumulate.

Repairing any surface defects is the final step in preparation. Fill cracks, holes, or dents with a suitable wood filler or spackle. Sand the repaired areas once dry to achieve a seamless surface. Properly prepped surfaces not only enhance the aesthetic appeal but also contribute to the longevity of your project.

Painting and Staining Basics for a Professional Finish

Mastering the art of painting and staining is crucial for achieving a professional-grade finish. Begin by choosing high-quality paints or stains suitable for your project. Consider the surface material and the desired look. Water-based paints are versatile and easy to clean, while oil-based options offer durability.

Investing in good-quality brushes and rollers ensures smooth and even application. Always prime surfaces before painting, especially if dealing with porous materials like wood. Primer enhances adhesion and improves the longevity of the finish.

Staining requires a different approach. Ensure the surface is clean and free of any previous finish. Apply stain evenly with a brush or cloth, following the wood grain for a natural appearance. Consider sealing the stained surface with a clear finish for added protection and sheen.

Upholstery Tips for Giving New Life to Old Chairs and Sofas

Reviving old chairs and sofas through upholstery is a rewarding endeavor. Start by carefully removing existing fabric, taking note of the original construction. Repair any damaged frames or springs before proceeding.

Choose a durable and aesthetically pleasing fabric for reupholstering. Consider the style of the furniture and the overall theme of your space. Measure and cut the fabric with precision, allowing for a snug fit. Use a staple gun to secure the fabric, pulling it taut for a professional appearance.

Don’t overlook details like piping or tufting for added elegance. If the existing cushioning is worn, consider replacing it with high-density foam for enhanced comfort. Upholstering old furniture not only breathes new life into cherished pieces but also allows for a personalized touch in your home decor.

FAQs

Q: Can I use any type of furniture for DIY makeovers?

Absolutely! While sturdier pieces are recommended, virtually any furniture can undergo a makeover. Assess the structural integrity and let your creativity guide the transformation.

Q: How long does a typical DIY furniture makeover take?

The duration varies based on complexity. Simple projects may take a weekend, while intricate transformations might span a few weeks. Patience is key for exceptional results.

Q: Is chalk paint suitable for all surfaces?

Chalk paint is versatile and adheres well to various surfaces, including wood, metal, and even fabric. Ensure proper preparation for optimal results.

Q: Can I combine multiple techniques in one makeover?

Certainly! Mix and match techniques to create a truly unique piece. Experimenting with different methods adds character and personalization to your furniture.

Q: Are DIY furniture makeovers cost-effective compared to buying new furniture?

Undoubtedly! DIY makeovers allow you to save money while expressing your creativity. Transforming existing pieces eliminates the need for expensive replacements.

Q: Where can I find inspiration for my DIY furniture makeover?

Inspiration is everywhere! Browse online platforms, visit flea markets, or explore interior design magazines for ideas that resonate with your style.

Conclusion

Embarking on a DIY furniture makeover journey is a rewarding endeavor that combines creativity, sustainability, and personal expression. By following these insights, you’ll not only breathe new life into old furniture but also discover the joy of crafting a home that reflects your unique style.